
All the Important Details You Need to Know Regarding Lip Fillers
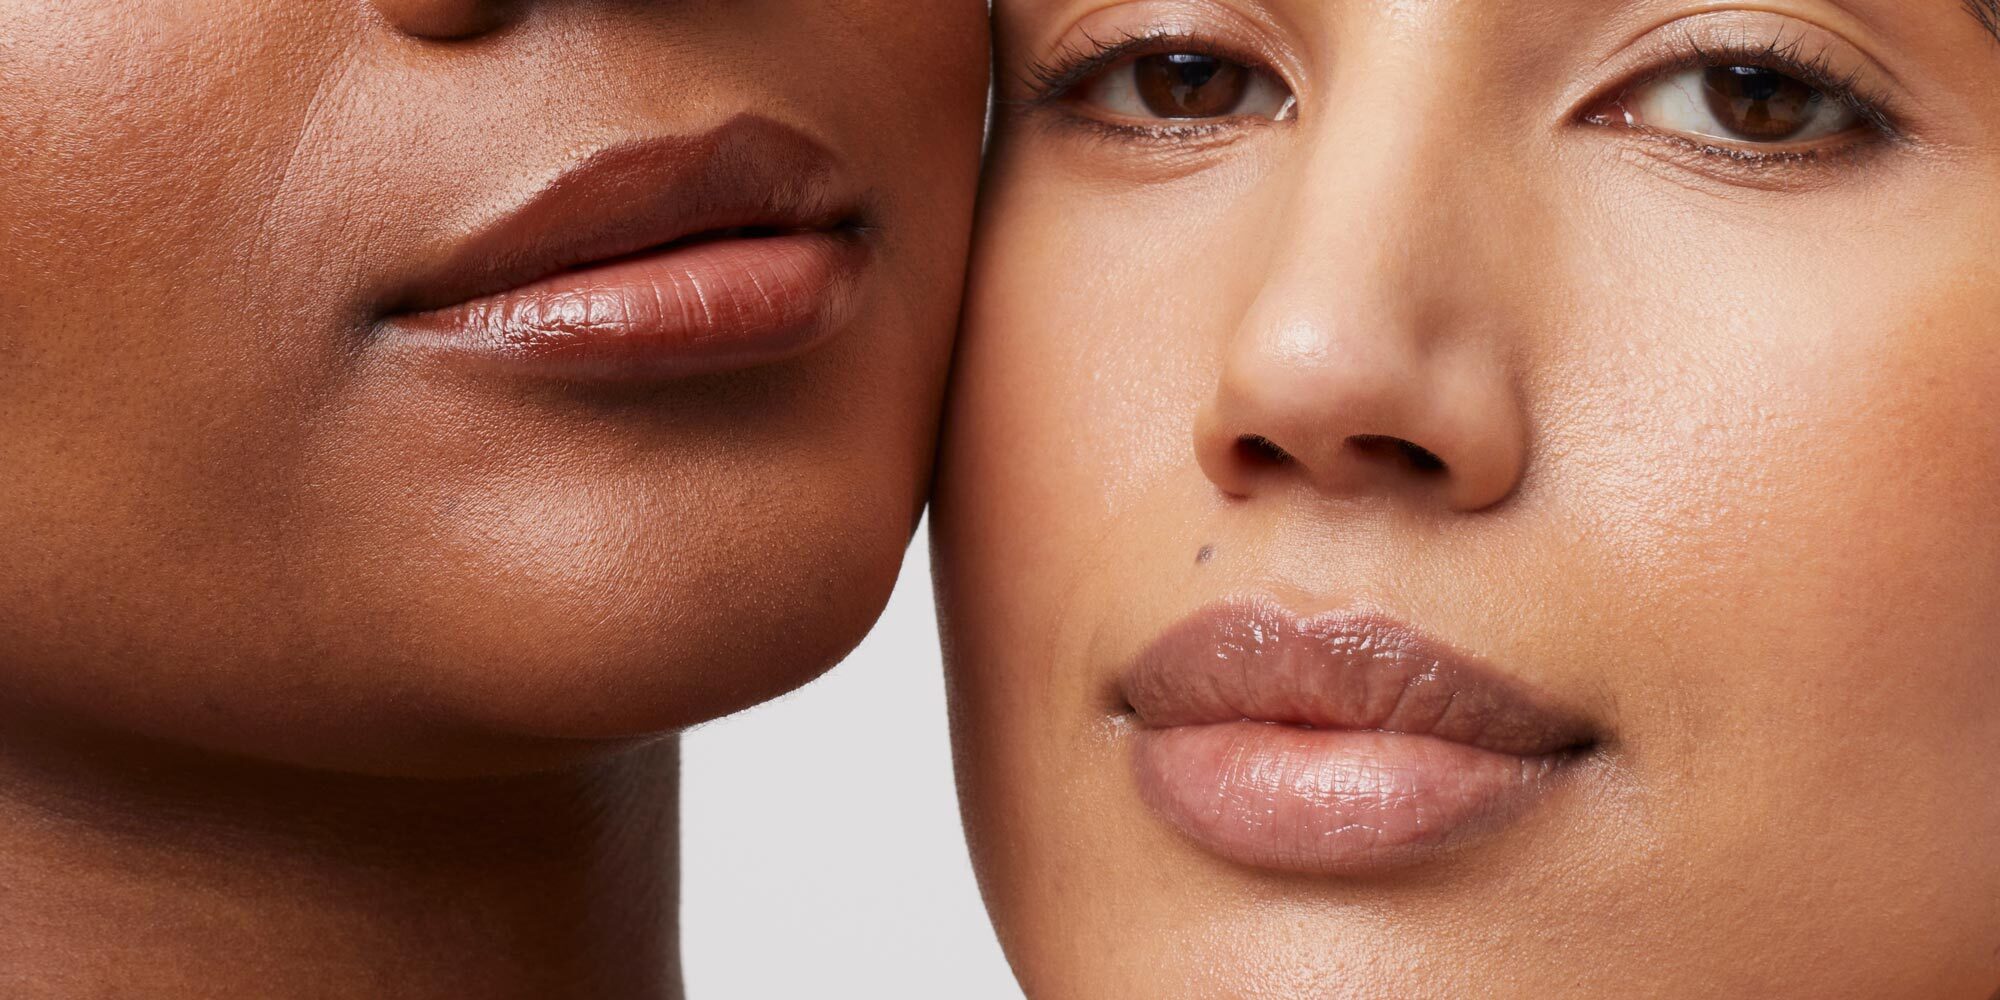
If you’ve ever considered getting lip fillers, you’re not alone. Over the years, I’ve seen firsthand how transformative they can be, not just for enhancing lip volume but also for boosting confidence. Whether it’s subtly restoring lost volume, adding definition to your natural shape, or simply creating that fuller, youthful look, lip fillers offer a non-surgical way to achieve your aesthetic goals with minimal downtime. But before you take the plunge, there’s a lot to consider—from choosing the right type of filler to understanding the recovery process. In this blog, I’ll share everything you need to know about lip fillers, giving you the insights and tips you need to make an informed decision and enjoy the best possible results.
What Lip Fillers Can Do For You?
There’s something about walking past the mirror one morning and realising your lips just don’t look how they used to. They’re a bit thinner, maybe a touch uneven, and that youthful plumpness you once had seems to have disappeared. I’ve had many clients at Cosmetic Aesthetics Victoria share that exact feeling with me. Some say they just want their “old lips back” — others are after a subtle boost to match the way they feel inside.
Lip fillers are an ideal solution for those looking to add natural-looking volume without surgery. When done right, they can restore balance, soften fine lines around the mouth, and improve the overall harmony of your face. I always say: the goal isn’t to create a new version of you — it’s to help you feel like yourself again.
In Melbourne, we often see a mix of goals — from 20-somethings wanting a defined cupid’s bow, to mature clients looking to smooth out vertical lines. Ageing, genetics, dehydration, and even climate (our dry, windy winters especially) can make lips appear deflated. That’s where a well-placed filler can work wonders.
The best part? It’s non-permanent, giving you the freedom to tweak or step back as your preferences evolve.
Lip Fillers For Fuller Lips Without Surgery
Now, I’ve lost count of how many times someone’s sat down in my chair and whispered, “I don’t want duck lips.” And I always smile — because that’s not what professional, strategic filler is about.
Lip fillers offer a surgical-free path to fuller, shapelier lips. It’s not about going big or bold (unless that’s your style) — it’s about customisation. Whether you’re after that softly plumped, post-holiday glow or aiming to redefine your lip border after years of collagen loss, there’s a technique to suit.
Let me give you an example. A client of mine, Anna — 38, mum of two from Carlton — came in feeling like her lips had vanished after her second pregnancy. She wasn’t after anything dramatic, just a little fullness and definition. We used just under 1ml of a soft HA filler, placed carefully to support her natural shape. Two weeks later, she texted, “My lips look like me, just fresher.” That’s the magic.
No scalpels, no stitches, no downtime. Just a bit of artistry and a lot of know-how.
Breaking Down The Types Of Lip Fillers Available
1. Hyaluronic Acid Lip Fillers – The Most Popular Choice
If I had a dollar for every time someone asked, “What’s actually in the filler?”, I’d have a coffee tab that never ends.
Hyaluronic Acid (HA) is the hero here — it’s a sugar molecule naturally found in our skin that holds up to 1,000 times its weight in water. That’s why HA-based fillers not only add volume but also boost hydration. In Melbourne’s dry summer heat or cold winter snap, keeping the lips hydrated from the inside out is a real advantage.
A key benefit of HA fillers is reversibility. If, for any reason, a client feels the filler isn’t quite right, we can use hyaluronidase to dissolve it safely, though that’s rarely needed when you work with precision.
2. Fat Transfers And Synthetic Fillers – Pros And Cons
Fat transfer is a completely different kettle of fish. It’s often marketed as “natural” since it uses your own body fat, but don’t be fooled — it’s a proper surgical procedure. Involves liposuction, purification, and reinjection into the lips. Yes, the results can last longer, even years, but they can also be uneven due to unpredictable fat absorption.
I once had a new client come in who’d had a fat transfer done overseas. She was hoping to “even things out” with filler, but unfortunately, with fat already in place, adding HA on top wasn’t a viable option. That’s the kind of long-term decision you need to weigh up carefully.
Then there are synthetic fillers often marketed as “permanent” solutions. These are largely falling out of favour here in Australia due to the risk of complications and the fact that they can’t be easily removed. Our TGA (Therapeutic Goods Administration) regulations are strict for good reason, and we never use or recommend products that haven’t been fully approved.
Here’s a bit of straight talk — permanent might sound appealing, but when it comes to your face, flexibility is your best friend.
Making The Right Choice For Your Lips
Here’s the truth: not all lip fillers are created equal, and neither are your lips. What works for your best mate, your sister, or that influencer you follow might not suit your features, your goals, or your lifestyle.
When someone walks into our Melbourne clinic, we always start by having a real conversation — no hard sells, just honest guidance. I often ask, “What do you love about your lips now?” and “What would you like to see change?” Some people are after a little plump in the centre, others want sharper borders, and some just want to hydrate and smooth.
That’s where the different filler textures come in. For instance:
- Soft, flexible fillers are perfect for fine lines or subtle hydration.
- More structured fillers work well if you’re after more definition or volume.
We also take into account things like:
- Your natural lip shape and symmetry.
- The thickness of your skin.
- Your age and skin elasticity.
- Your history with fillers (if any).
One of my long-time clients, Eliza, had a great point the other day. She said, “It’s like tailoring clothes — you don’t want something that looks good on the rack, you want something that fits you.” She nailed it. Lip enhancement isn’t about copying someone else’s look — it’s about customising yours.
And that’s why I never recommend starting with more than 1ml at a time, especially if it’s your first go. You can always build gradually, but once it’s in, overfilling can be hard to correct without dissolving.
Lip Fillers Vs Lip Implants – Key Differences
| Feature | Lip Fillers | Lip Implants |
| Material | Gel-based (usually hyaluronic acid) | Silicone or other synthetic material |
| Procedure Type | Non-surgical (injection-based) | Surgical (requires incisions) |
| Duration | Temporary (6–12 months on average) | Permanent (until surgically removed) |
| Adjustability | Fully adjustable — can be added, removed, or dissolved | Not easily adjustable — requires surgery for removal or changes |
| Invasiveness | Minimally invasive — quick recovery, usually under an hour | Invasive — longer recovery, surgical risks |
| Best For | Gradual enhancement, trial runs, flexible outcomes | Permanent volume increase (typically not recommended for aesthetics) |
| Risks | Mild swelling, bruising, and potential for allergic reaction | Implant shifting, asymmetry, and surgical complications |
| Recommended Use | Aesthetic enhancement with control and flexibility | Rarely recommended for aesthetic purposes in Australia |
| Alternative Long-Term Option | Fat transfer or ongoing filler maintenance | Revision surgery if complications occur |
Before You Book – Consultation Essentials
The Lip Filler Treatment Basics You’ll Cover
Every treatment begins with a proper chat, and I can’t stress this enough. A lip filler consultation isn’t just a tick-box exercise. It’s where trust is built, expectations are set, and safety is prioritised.
At our clinic in Victoria, the consultation usually takes about 30–45 minutes. We start by asking a few basic questions, but quickly get into more tailored territory:
- What are your goals? Is it more shape, definition, or hydration?
- Have you had fillers before? If so, when and what kind?
- Any medical conditions, medications or allergies? This is crucial, especially for things like autoimmune conditions, diabetes, or blood thinners.
Now here’s something I see too often — clients coming in who weren’t told that certain health issues, like active cold sores or pregnancy, mean they can’t proceed safely. It’s our job as practitioners to ask the right questions, not just the easy ones.
And sometimes, we advise waiting. I remember a client who was preparing for her wedding and booked in for a filler two weeks before the big day. After talking it through, we decided to postpone — swelling or bruising, though usually minimal, wasn’t worth the risk with photos on the line. She ended up coming back a month after the honeymoon, calm and ready.
It’s that kind of personalised approach that sets great clinics apart from the pop-ins.
Consultation Process For Lip Filler Treatments
Let me walk you through what happens during a proper lip filler consultation, because not every clinic does it the right way.
Step 1: We Listen.
You talk, we take notes. It’s not about jumping straight into treatment — it’s about understanding what you want. If you’ve got reference photos, bring them. They help clarify your aesthetic, but we’ll always balance them against what’s achievable for your face.
Step 2: Facial Assessment.
We look at your lips not in isolation, but in context, with your nose, chin, and overall proportions. This is how we decide whether to enhance the border, add volume to the body, or just hydrate. We check for asymmetries and discuss realistic outcomes.
Step 3: Education.
We walk you through the types of fillers that might work best, based on texture, longevity, and how they integrate with your tissue. I always say, “The more you know, the more confident you’ll feel.”
Step 4: Risks and What to Expect.
You’ll learn about side effects, how to care for your lips post-treatment, and the importance of the two-week healing window. We’ll also discuss things like filler migration, vascular occlusion, and why injectables should never be rushed.
Step 5: Your Plan.
Finally, we offer a personalised treatment plan — sometimes that means treatment on the day, sometimes it’s better to wait. Either way, we leave space for questions and make sure you feel confident, not pressured.
Here’s a quick Checklist you should expect during your consultation:
- Detailed medical history taken
- Full facial assessment
- Clear breakdown of filler options and product names
- Discussion about risks, side effects, and downtime
- A personalised treatment plan (including product volume)
- Time for you to ask questions — no rushing
Remember: the consultation is as much for you to assess the injector as it is for us to assess your suitability. If something doesn’t feel right, walk away. A trustworthy injector will never push you into a same-day decision.
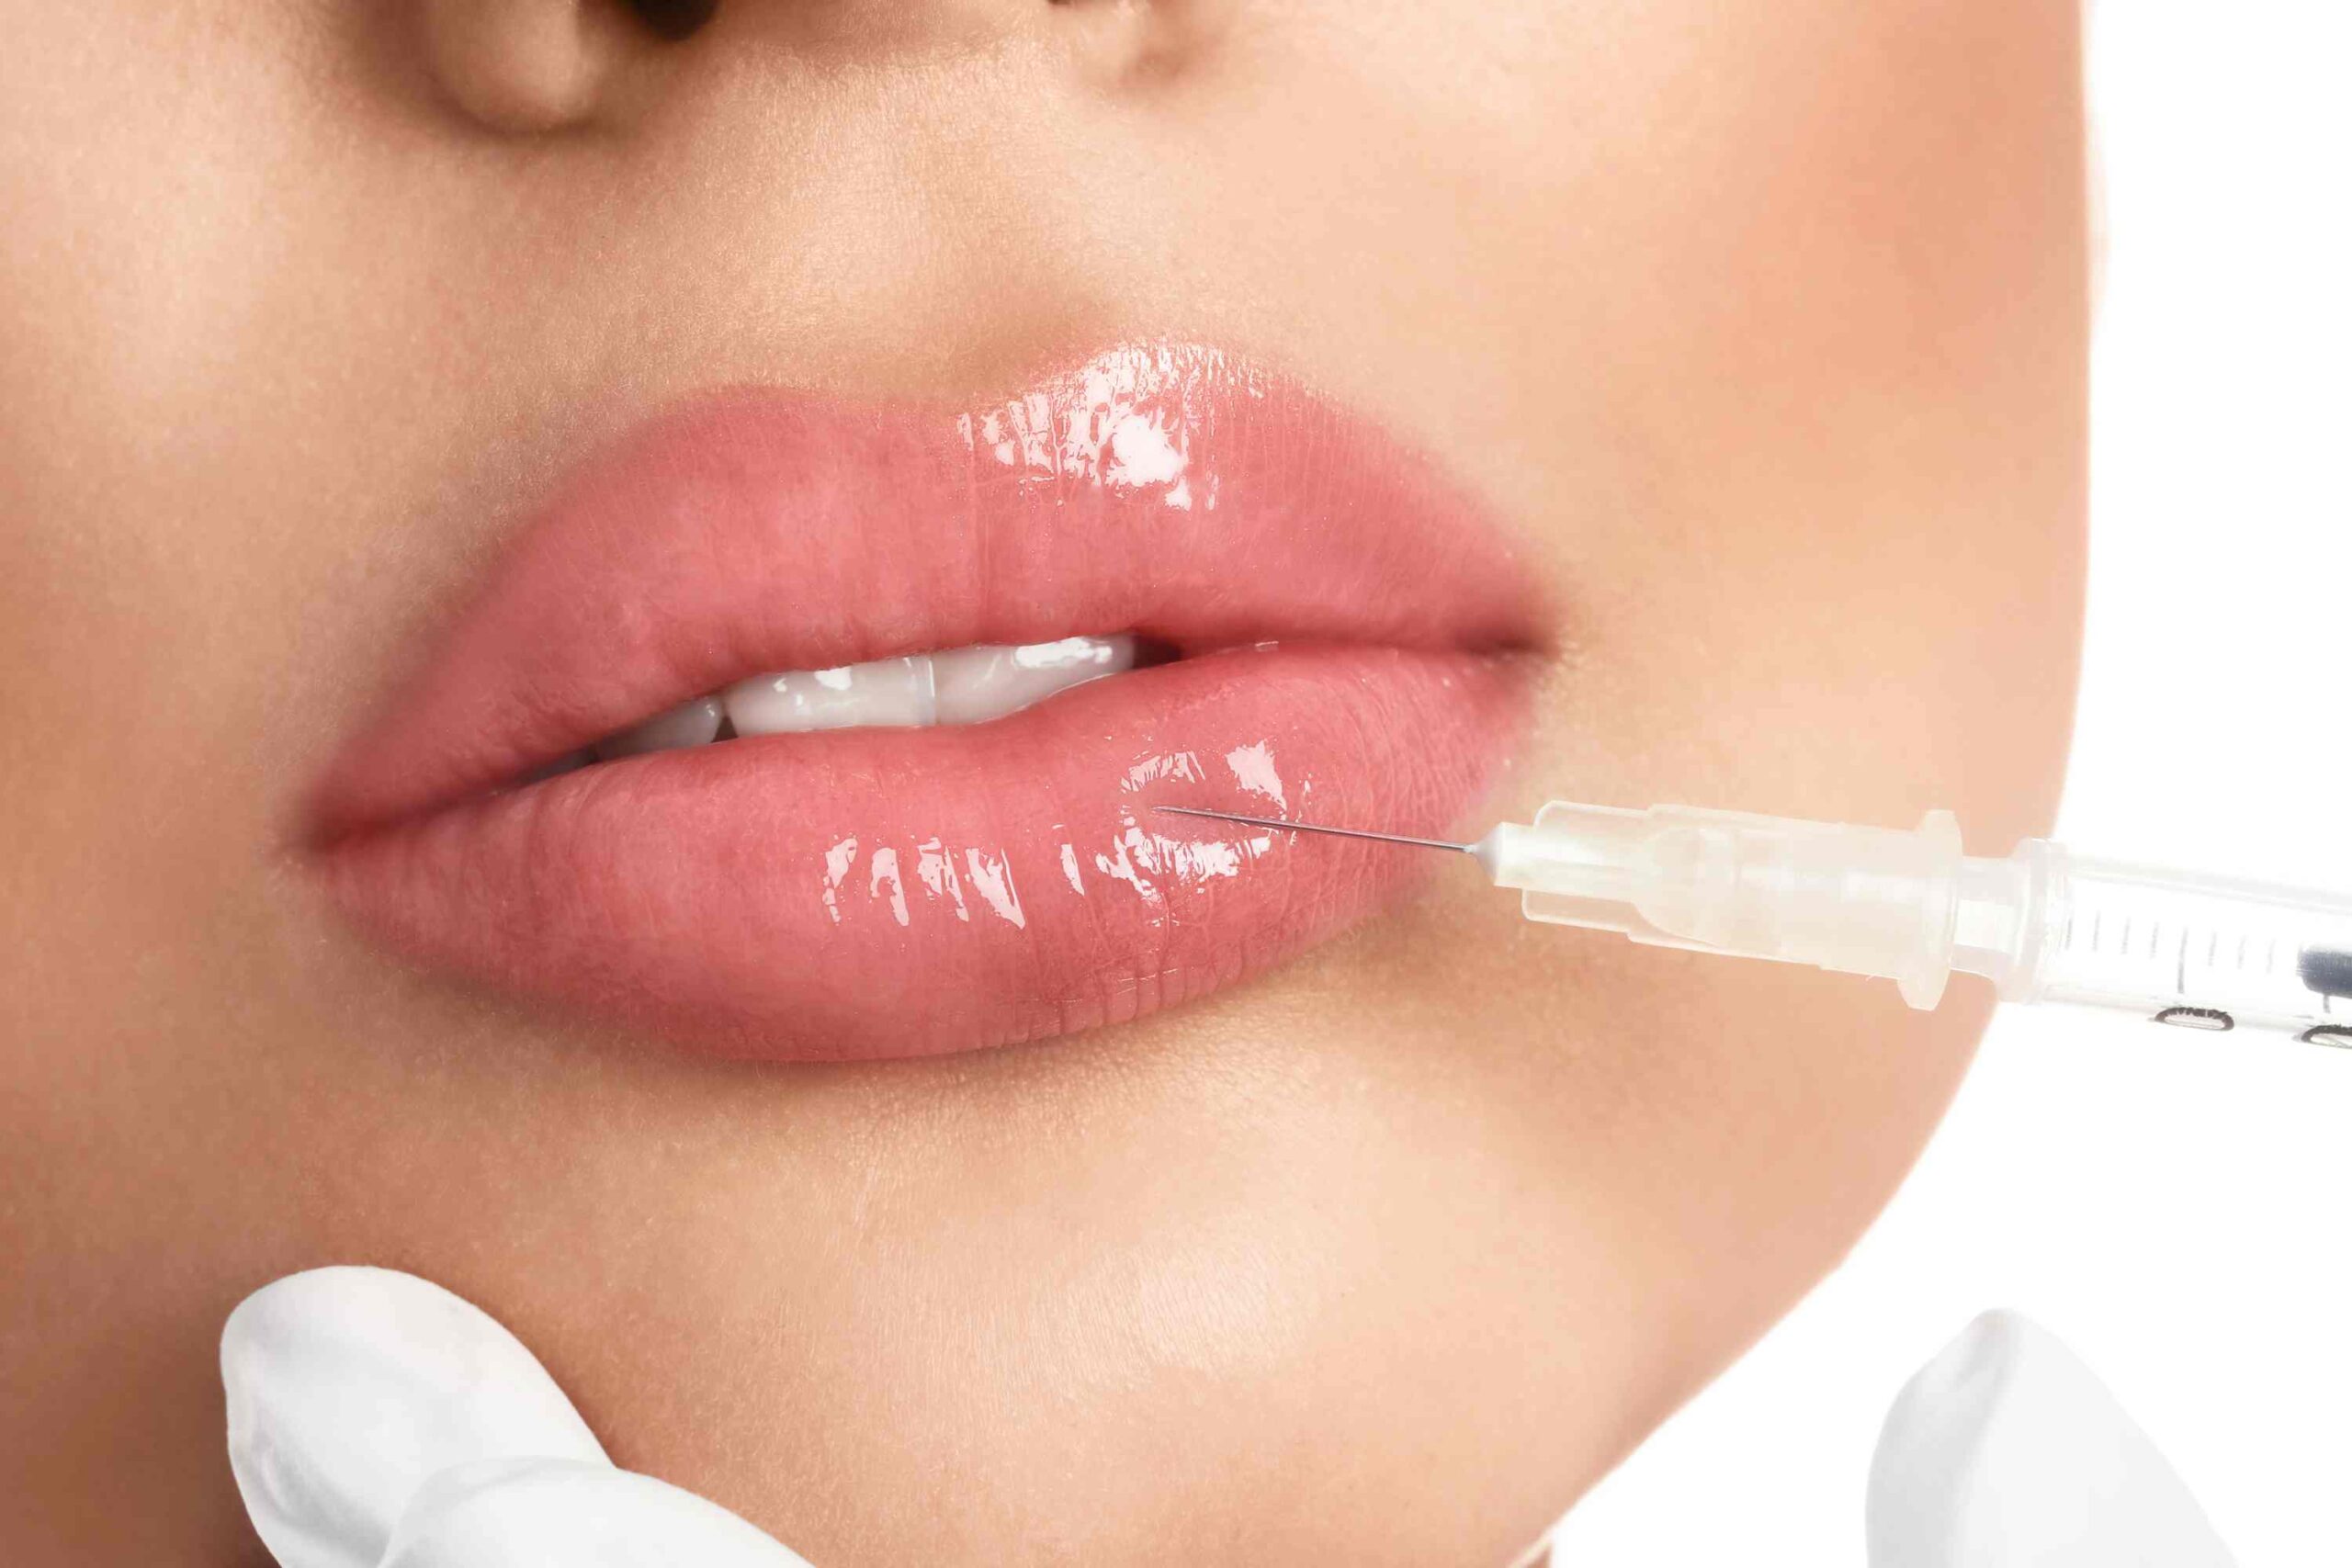
The Lip Filler Procedure – Step By Step
How Lip Fillers Work And Their Benefits?
It’s common for clients to feel a bit nervous before their first lip filler session. “Will it hurt?” “Will I look like myself?” These are the questions I hear most often. The good news is — when performed with care, the treatment is quick, relatively comfortable, and results can be beautifully subtle.
Here’s how it works: hyaluronic acid gel is injected into targeted areas of the lips — like the border, body, or corners — using either a fine needle or a blunt-tip cannula. The method depends on your anatomy and goals. For example, I tend to favour a cannula for reducing bruising in mature clients, while younger lips needing a shape boost may benefit more from needle work.
What makes fillers so effective?
- Hydration: HA attracts water, plumping the lips naturally from within.
- Structure: The filler supports your existing lip tissue, creating lift and shape.
- Definition: Carefully placed filler can sharpen the cupid’s bow, smooth out asymmetry, or build volume gradually over time.
I recall a client, Jo, who came in worried her lips would feel “hard” after filler. We used a soft HA blend, applied delicately to her top lip, and two weeks later, she said, “I forget it’s even in there — they just feel like my lips.” That’s the kind of result we aim for every time.
And don’t worry — most fillers contain a small amount of lidocaine, a local anaesthetic, which kicks in within seconds to keep things comfortable.
What To Expect Before And After Lip Fillers?
Let’s be real — there’s a bit of prep and post-care involved, but it’s manageable with the right advice.
Before Treatment
Here’s what we typically recommend in the days leading up:
- Avoid alcohol, fish oil, and aspirin/ibuprofen for 48–72 hours beforehand (these thin the blood and increase bruising).
- No dental work or major facial treatments for at least 2 weeks before or after.
- If you’ve ever had a cold sore, let us know! We’ll often prescribe an antiviral as a precaution.
On the day: You’ll come in, we’ll cleanse the area thoroughly, apply a numbing cream, and allow that to work for about 10–15 minutes. The whole injection process usually takes 15–30 minutes ,depending on your plan.
After Treatment
Here’s a simple Timeline of what to expect:
| Timeframe | What to Expect |
| Immediately | Slight swelling, redness, tenderness |
| 24–48 hours | Swelling often peaks, and possible bruising |
| Day 3–5 | Swelling starts to ease, and lips feel tight |
| Day 7–10 | Most swelling resolved, early results showing |
| Day 14 | Final result visible, follow-up if needed |
Post-Treatment Care Tips
To help your lips heal quickly and avoid complications:
- Ice packs: Use them (wrapped, not directly on skin) for 10-minute intervals throughout the day.
- Stay upright: Sleep with an extra pillow under your head for the first few nights.
- Avoid: Strenuous exercise, alcohol, smoking, kissing, hot baths, or saunas for 48 hours.
- No makeup: Keep the area clean and bare for at least 24 hours.
- Hydrate: Drink water and avoid salty foods for a few days.
And here’s the thing: lips often look worse before better. It’s part of the process. A client of mine, Natalie, once messaged me in a panic on day two, convinced that one side looked bigger. By day six, it had all evened out beautifully. That’s why I always say — trust the two-week rule. Let everything settle before assessing the final shape.
If needed, we do a complimentary follow-up at that two-week mark to fine-tune or add more if the client wants it.
H2: Recovery, Results, And Real Talk
If I had a dollar for every time someone panicked on day two of healing, I’d have enough for a lifetime supply of Arnica cream.
Recovery from lip filler is usually mild, but it’s rarely “zero downtime” — especially in the first few days. I always tell clients: expect swelling, and you won’t be surprised by it.
Here’s what’s completely normal:
- Swelling and mild bruising in the first 48 hours.
- Tenderness or a tight feeling, especially in the top lip.
- Unevenness or slight asymmetry during healing.
This is part of your body adjusting. I like to explain it like this: imagine someone gave your lips a little workout — they’ll puff up, feel tight, and need time to bounce back.
Some people barely notice a thing. Others, especially those prone to bruising, may need a bit longer. Everyone heals differently — that’s why I encourage people not to book a filler appointment right before big events or photo shoots. Ideally, give yourself two full weeks before you want to look your best.
A few recovery tips we share with clients in the clinic:
- Avoid hot showers or saunas for two days (heat can increase swelling).
- No heavy workouts for at least 48 hours.
- Sip with a glass, not a straw, for a few days (it reduces puckering strain).
- No kissing or rubbing your lips, tempting as it may be.
- Skip spicy foods, especially in the first day or two.
Also, no flying straight after your appointment — cabin pressure can cause lips to balloon slightly more than they otherwise would. One client flew to Sydney the day after treatment and texted, “My lips felt like they were auditioning for their own travel show!” It all settled by day five, but that’s one travel tip I always pass on now.
Duration Of Lip Filler Results – How Long Do They Last?
This is probably the most frequent question I hear — right after “Will it hurt?” — and the answer depends on a few key factors.
Generally speaking, lip fillers last between 6 and 12 months, sometimes up to 18 months, depending on:
- The type of filler used (thinner fillers wear off faster).
- Your metabolism (fast metabolisms break down HA quicker).
- Lifestyle factors — high cardio exercise, sun exposure, and smoking can reduce longevity.
- Volume injected — smaller amounts fade sooner.
One of my long-term clients, Sara, runs marathons. Her lip filler tends to fade quicker than most, closer to the 5–6 month mark. Meanwhile, others who don’t train as intensively may get a solid 10–12 months out of their treatment.
Signs It’s Time For A Top-Up:
- The definition around your vermilion border starts to fade.
- Volume feels “deflated”, or lips feel less firm.
- Asymmetry becomes noticeable again (especially if it was corrected previously).
The beauty of HA fillers is that maintenance doesn’t mean starting from scratch each time. Often, all you need is a little top-up — a half-syringe or so — to keep everything balanced and fresh.
We usually recommend checking in every 6–9 months if you’re looking to maintain a consistent look. This also helps prevent overfilling, which can stretch the tissue and lead to what’s known as “filler fatigue.”
Remember — less is often more. It’s about balance, not bulk.
Staying Safe – Side Effects And Risk Management
| Category | Effect/Risk | Details |
| Common (Expected) | Swelling & Bruising | Especially in the first 48 hours, it is typically mild and resolves within a week |
| Tenderness/Sensitivity | At the injection sites, usually short-lived | |
| Redness or Itching | Mild and temporary | |
| Lumps or Firmness | Typically caused by swelling, not the filler product itself | |
| Rare (More Serious) | Cold Sore Reactivation | Risk for those prone to cold sores; antivirals (e.g., valaciclovir) can reduce the likelihood |
| Allergic Reactions | Rare, usually due to lidocaine or preservatives. Watch for hives, itching, or extended swelling | |
| Filler Migration | Product moves outside the intended area; can lead to puffiness or asymmetry, often due to poor technique | |
| Infection | Signs include warmth, pus, or worsening pain; requires medical attention | |
| Vascular Occlusion | Most serious risk: filler blocks blood flow. Watch for blanching, intense pain, or purple skin |
Managing Complications And When To Seek Help
Let’s say something feels off. Your lip feels hard, or one side looks lumpy, or the pain seems to be getting worse instead of better. Don’t jump to conclusions, but don’t wait it out, either.
Here’s when to contact your practitioner — immediately:
- Pain that worsens rather than improves
- White, grey, or purple patches on or near the lips
- Swelling that worsens after day three
- Visible lumps that don’t soften within a week
- Signs of infection (fever, pus, spreading redness)
What Not To Do:
- Don’t try to massage it out yourself.
- Don’t apply heat — this can make swelling or vascular issues worse.
- Don’t take unapproved medications like aspirin or ibuprofen post-treatment unless cleared by your injector.
If you’ve received filler at a walk-in clinic or overseas and can’t reach the injector, go to your GP or emergency department. Delayed treatment can lead to scarring or tissue loss.
At our clinic, we have a clear aftercare protocol that includes:
- A printed care sheet.
- A 24-hour emergency number.
- A two-week check-up appointment to assess healing and tweak if needed.
We always tell clients: you’re not on your own once you leave the clinic. That follow-through makes all the difference when complications arise, rare as they may be.
Best Practices After Getting Lip Fillers
You’ve had your lip filler treatment, and now you’re eager to show off your fresh look — but let’s hold our horses. How you treat your lips in the first few days plays a big role in ensuring the best possible results.
Here’s a checklist for optimal healing:
- Ice and elevate: Ice packs for the first 24-48 hours will help reduce swelling and bruising. Keep your head elevated when you sleep to reduce pressure on the lips.
- Avoid pressure on your lips: Skip the kissing and puckering (e.g., drinking from straws) for a couple of days. It helps prevent filler migration.
- Stay hydrated: Drink plenty of water to help your body integrate the filler.
- No smoking or alcohol: Both can affect healing. Smoking can also dry out your lips, which isn’t ideal when you’re trying to keep them plump and hydrated.
- Skip heavy workouts: Anything that makes your heart race will boost blood circulation and can increase swelling. Stick to light walking or stretching for the first few days.
- Be mindful of sun exposure: Give your lips some TLC — avoid direct sunlight, hot baths, or saunas for 48 hours. Your lips are healing and should be treated gently.
One thing I tell clients is that it’s tempting to check your lips every 10 minutes after treatment, but try not to obsess! It’s the body’s job to settle everything in over a week or so. So, give your lips time to settle and don’t make a judgment too soon.
Achieving Balanced, Natural Results
I’ve always believed that the most successful lip filler treatments are those that enhance your natural beauty without completely altering your appearance. Natural results come down to a combination of factors: the right type of filler, precise technique, and the injector’s eye for detail.
The secret to natural-looking lips?
- Start conservatively: It’s tempting to go all in, but less is often more when it comes to fillers. A subtle enhancement will keep your lips looking natural and youthful. I always tell new clients, “Let’s start with half a syringe, and we’ll see how you feel in a couple of weeks.”
- Focus on proportion, not just volume: Adding volume is only part of the equation. A balanced lip shape is what makes all the difference. Whether you want a sharper cupid’s bow or fuller lower lip, the key is symmetry. For example, a client of mine, Claire, wanted fuller lips but had a naturally thin upper lip. We used a little extra filler on the upper lip to create a proportionate balance, and the results were subtle, not over-the-top.
- Choose the right product: Not all lip fillers are created equal. Soft, flexible fillers like Juvederm Volbella or Restylane Kysse are perfect for a subtle, hydrated look. They integrate smoothly into the tissue, providing a soft, natural feel. Fillers that are too firm can make your lips look “stiff” or “overfilled.”
- Work with your injector: A skilled injector knows how to enhance your natural shape rather than create something entirely new. You should always feel heard during the consultation process. Express your goals, but also trust the expertise of your practitioner. For instance, when we work with clients who have uneven lips or minor asymmetry, we adjust our approach to make sure they don’t look “filled” — just subtly enhanced.
- Patience during the healing phase: After treatment, the filler will need time to settle. You may notice slight unevenness, swelling, or firmness during the first few days, but this should all smooth out within a week. At that point, your lip’s natural contour will shine through. One of my regular clients, Lucy, had concerns about uneven swelling on day 2, but by day 10, the results were perfectly in line with what she wanted.
If you’re considering lip fillers, you’re not alone in seeking a way to enhance your natural beauty and boost confidence. With the right treatment and the guidance of a skilled practitioner, lip fillers offer a non-surgical solution that can restore volume, smooth out lines, and create more defined, youthful lips. Whether you’re looking for a subtle enhancement or a more dramatic change, there’s a range of options tailored to your needs. However, as with any cosmetic procedure, understanding the types of fillers, potential risks, and recovery process is crucial for achieving the best results. By choosing the right clinic, asking the right questions, and following aftercare guidelines, you’ll be on your way to enjoying your refreshed look in no time. So, if you’re ready to take the next step, make sure you’re well-informed and confident in your decision.
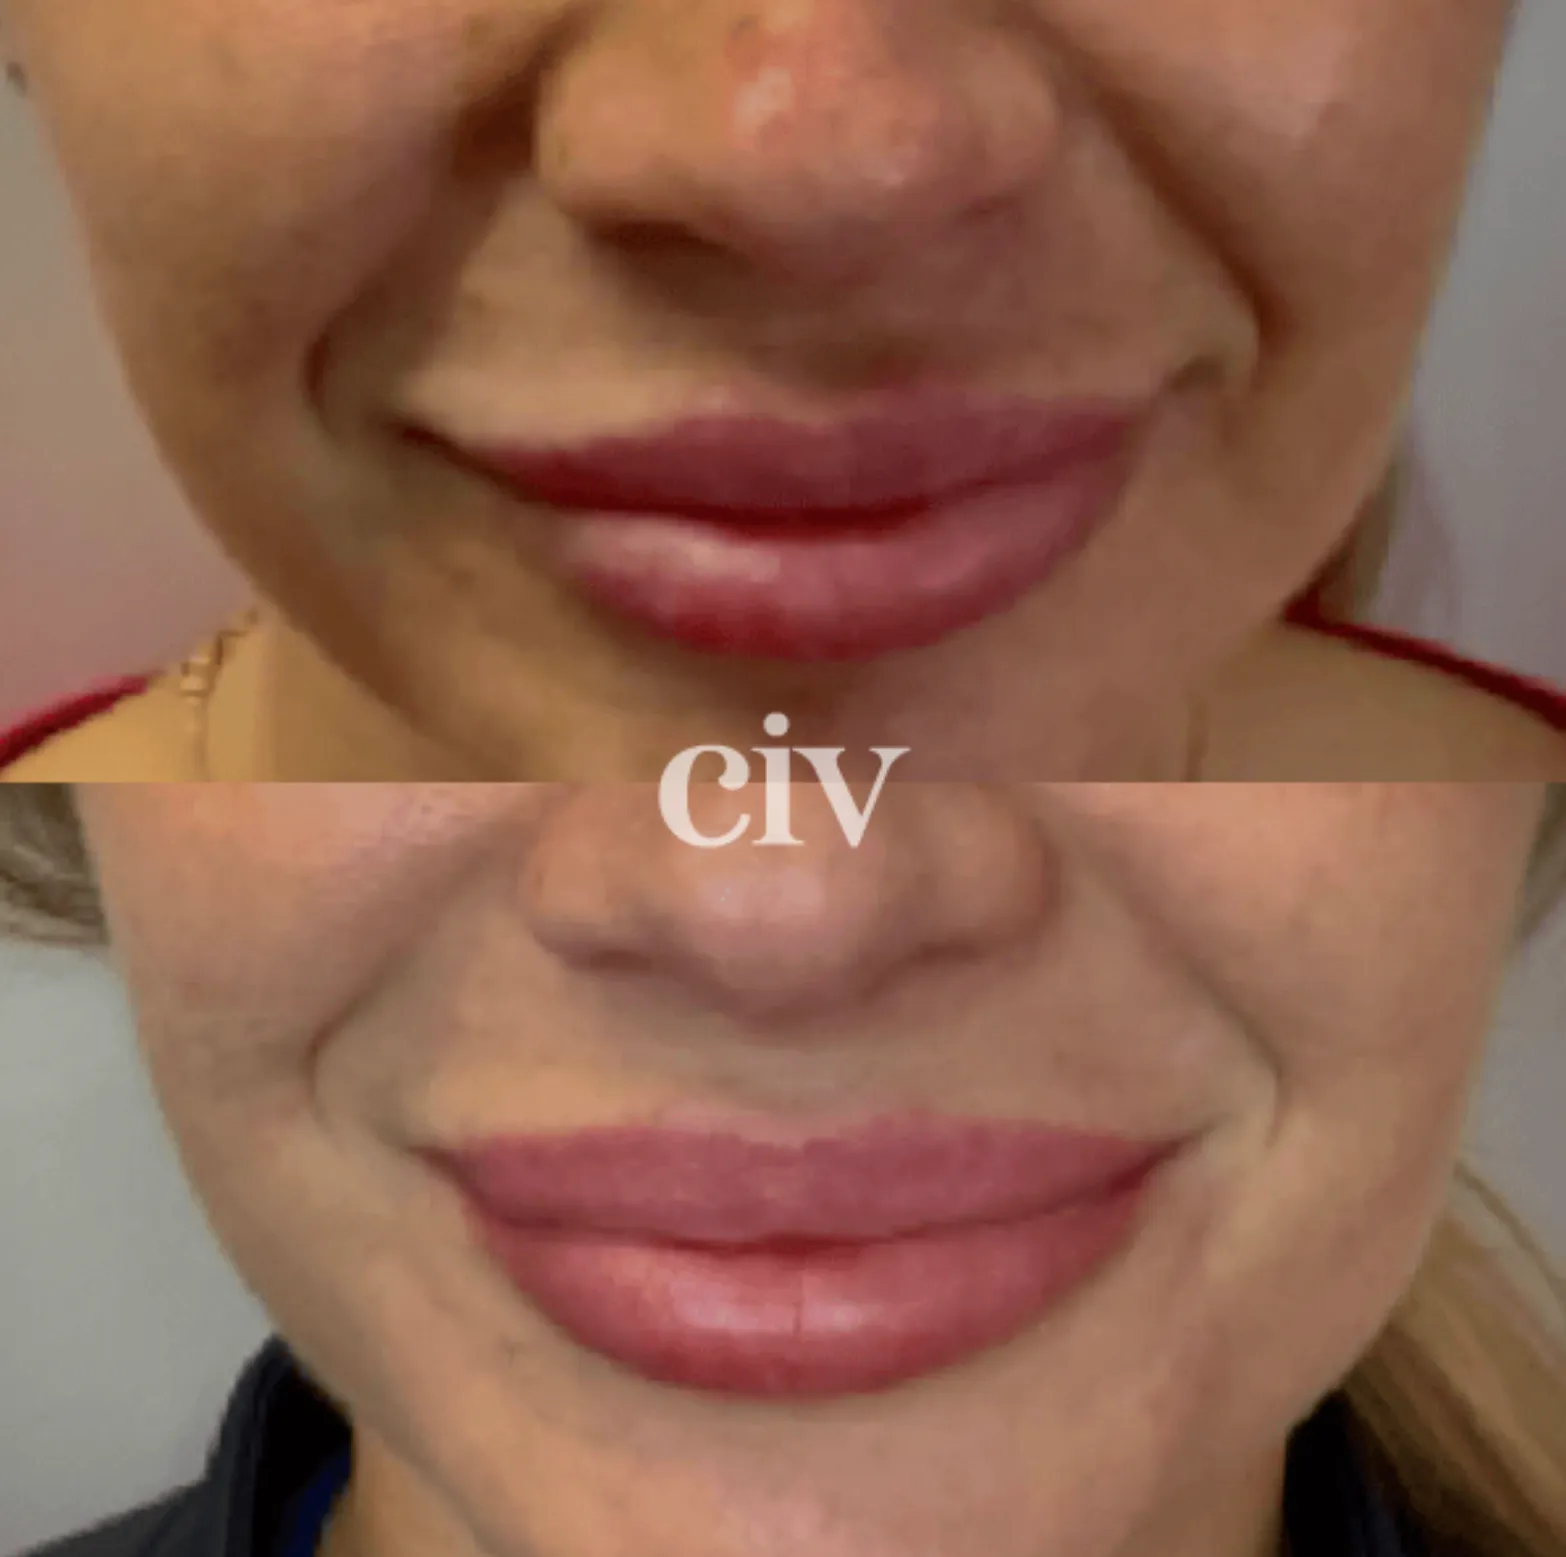
What you need to know for before and after Lip filler procedure.