
An Expert Guide To Dermarolling At Home Properly
Have you ever wondered if you could achieve smoother, firmer skin without leaving the comfort of your home? Well, you’re not alone. Dermarolling, or at-home microneedling, has become one of the most popular DIY skincare treatments in recent years—and for good reason. As someone who’s worked with countless clients to improve their skin, I can tell you that when done correctly, dermarolling can be a total game-changer.
In this guide, I’ll discuss with you everything you need to know about dermarolling at home—from choosing the right dermaroller to mastering the technique and crafting a solid post-treatment skincare routine. Whether you’re tackling acne scars, fine lines, or simply want to give your skin a little TLC, this expert guide has got you covered. Let’s dive in!
What Is Dermarolling And Why Should You Consider It?
When I first started dermarolling at home, I wasn’t entirely convinced that the results would live up to the hype. I had heard mixed opinions about the technique, but after reading up on it and giving it a shot, I quickly became a believer. For anyone unfamiliar with the term, dermarolling, also known as microneedling, is a treatment that uses a device with tiny needles to create controlled micro-injuries on the skin’s surface. These micro-injuries trigger the body’s natural wound-healing process, leading to the production of collagen and elastin, key players in keeping our skin firm, youthful, and radiant.
While it might sound intense, dermarolling is surprisingly simple to do at home, and with the right tools and techniques, it’s an affordable and effective way to achieve smoother, healthier skin. Plus, it’s a fantastic way to enhance the effectiveness of your skincare products. Think of it like opening tiny doors in your skin that let serums and moisturisers penetrate deeper, maximising their benefits.
The Benefits Of Dermarolling At Home
There are several benefits of dermarolling at home that I can personally vouch for. I remember using it on my fine lines and acne scars, which had been stubbornly lingering despite trying countless creams and treatments. After just a few sessions, my skin looked visibly smoother, scars started fading, and those tiny wrinkles seemed to soften.
Here’s a rundown of the key benefits:
- Skin rejuvenation and collagen production – The tiny punctures caused by the dermaroller stimulate your skin’s collagen and elastin production, resulting in firmer and more youthful-looking skin.
- Acne scarring improvement – Dermarolling promotes skin healing, reducing the appearance of acne scars. It’s worked wonders on my old scars, which are now far less noticeable.
- Enhanced product absorption – With the skin’s surface more receptive post-dermarolling, your skincare products can penetrate deeper, giving them a better chance to work their magic.
- Hair growth stimulation – While this isn’t something I’ve tried personally, using a dermaroller on the scalp has been shown to promote hair growth by stimulating hair follicles. It’s one of the more popular uses for men and women dealing with thinning hair.
Risks And Who Should Avoid Dermarolling At Home
While I’m a big fan of dermarolling, I do acknowledge that it’s not for everyone. When I first started, I was a bit cautious. It’s easy to get excited about the idea of improving your skin, but it’s equally important to understand when to steer clear of dermarolling.
Some common risks include:
- Infection – If the dermaroller isn’t disinfected properly before and after use, you could risk introducing bacteria into your skin. This can lead to breakouts, irritation, or worse—an infection.
- Scarring – If too much pressure is applied or if you overuse the dermaroller, you might end up causing unnecessary trauma to your skin, leading to scarring.
- Hyperpigmentation – Overuse or incorrect use of dermarolling can cause areas of your skin to darken, especially for people with darker skin tones.
- Prolonged redness, irritation, or swelling – While it’s normal to see a bit of redness after rolling, prolonged irritation could signal that you’re not following the correct technique.
Who should avoid dermarolling at home? If you have active acne, open wounds, eczema, or psoriasis, dermarolling can irritate these conditions, potentially making them worse. It’s also not recommended if you’re pregnant, breastfeeding, or on medication. If in doubt, always consult a professional before diving in.

Choosing The Right Dermaroller For Your Skin Type And Needs?
Alright, let’s talk about the tool of the trade—the dermaroller. When I first introduced dermarolling to my clients, I’d always make sure to ask: “What’s your skin concern? And how comfortable are you with the process?” This question helps me guide them toward the right tool, because the size of the needles matters.
A dermaroller might look simple, but picking the right one for your needs can make all the difference in the world. Let me break it down:
|
Needle Length |
Best For |
Usage Frequency |
Notes |
|
< 0.3mm (0.1–0.25mm) |
Beginners, skincare absorption, mild texture improvement, and radiance |
2–3 times per week |
Non-invasive, comfortable, minimal risk |
|
0.5mm |
General rejuvenation, fine lines, mild scarring, hyperpigmentation |
Every 10–14 days |
Visible results with minimal downtime |
|
1.0mm |
Deeper acne scars, advanced wrinkles |
Every 3–4 weeks |
More effective, may require numbing cream for comfort |
|
1.5mm and above |
Deep scars, stretch marks, and cellulite |
Professional use only |
Requires expertise, caution, and proper skin preparation |
Preparing Your Skin For Dermarolling
You know the saying, “Fail to prepare, prepare to fail”? Well, when it comes to dermarolling, preparation is key. The last thing you want is to waste your effort (or worse, hurt your skin) by skipping vital steps.
Here’s what I do:
- Disinfect the roller – Before each use, I soak my dermaroller in 70% isopropyl alcohol for about 10-15 minutes. It’s essential to kill any bacteria that could be lurking on the device.
- Cleanse the skin – I always double cleanse, especially after wearing makeup. A clean canvas is crucial for the dermaroller to glide smoothly and do its job.
- Sanitise the skin (optional for longer needles) – If you’re using needles longer than 0.5mm, wipe the treatment area with alcohol to ensure it’s disinfected.
- Numbing cream (if necessary) – If you’re going for longer needles, applying a numbing cream can be a game-changer. But make sure to wipe it off completely before dermarolling—otherwise, it can interfere with the rolling process.
The Dermarolling Process: A Step-By-Step Guide
The first time I dermarolled, I was a bit nervous. I’d heard all sorts of stories—both good and bad—about the experience. But once I understood the steps, it became one of the most relaxing parts of my skincare routine. Now, it’s second nature. Here’s how I approach it:
Step-By-Step Dermarolling Guide
- Divide the Area into Sections
I always mentally divide my face or the area I’m working on into smaller sections. This ensures I’m thorough and don’t miss any spots. Think of it like a grid where each area gets equal attention. It’s also easier to manage if you’re dermarolling your scalp or body. - Roll with Confidence
The most common mistake I made initially was not applying enough pressure. It’s easy to get carried away and press too hard, but gentle to medium pressure is ideal. You don’t need to push hard—let the needles do the work.
I start by rolling in one direction—usually vertically—and roll 4-10 times over each section. It’s important to lift the roller each time you move it to a new spot. This prevents you from pressing down too hard and ensures a uniform treatment. - Change Directions
After covering the area in one direction, I then roll perpendicular to the first direction. For example, after rolling vertically, I roll horizontally to cover the area from every angle. This maximises the effectiveness of the treatment. Some experts recommend diagonal rolling, but I prefer to keep it simple and avoid any chance of causing uneven results or “tram track” scarring. - Keep the Pressure Light
With shorter needles, your skin should only flush with redness, but you shouldn’t see blood. If you notice pinpoint bleeding, it’s normal with longer needles, but always aim for gentle pressure. Too much pressure can lead to unnecessary skin trauma. - Duration of Rolling
I limit the dermarolling to 2-3 minutes for my face. If I’m rolling larger areas like my thighs or back, I might go up to 10 minutes. I’d recommend starting slow if you’re a beginner, and only gradually increasing your time and pressure as you gain confidence and experience. - Frequency
For most of us, less is more. If you’re using needles shorter than 0.5mm, you can dermaroll more frequently, anywhere from 2-3 times per week. However, with longer needles, space out your sessions by at least 7-10 days to give your skin adequate time to heal.
Post-Dermarolling Skincare Routine: What To Do After?
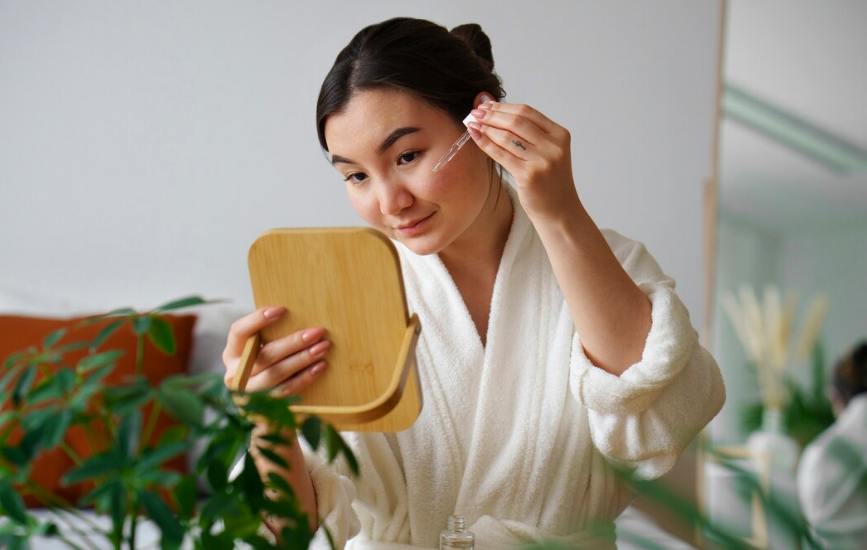
Once you’ve finished dermarolling, it’s time for the most important step: aftercare. Think of it like caring for a garden after planting new seeds—your skin is in recovery mode, and what you do next will make all the difference.
Here’s how I recommend you take care of your skin post-dermarolling:
- Rinse Your Face: After you’ve finished rolling, rinse your face gently with cool water to calm the redness. Don’t use any harsh cleansers just yet. Your skin is in a sensitive state, and you don’t want to irritate it further.
- Hydrate: Right after dermarolling, your skin is in a prime state to absorb hydration. Apply a hydrating serum with ingredients like hyaluronic acid or niacinamide, which are perfect for skin recovery and boosting moisture levels. In my experience, this is when I see the most noticeable difference in skin texture: hydrated, plump, and fresh.
- Avoid Harsh Products: Here’s the tricky part. I know many people love their active ingredients, but post-dermarolling is not the time to use them. Avoid vitamin C, retinol, glycolic acid, and other strong actives for 48 hours after dermarolling. Trust me—your skin will thank you.
- Sun Protection is Key: If there’s one thing I’ll say over and over, it’s this: always wear sunscreen after dermarolling, and I mean a broad-spectrum SPF 30 or higher. The skin is more vulnerable to UV damage after microneedling, so make sure to protect it, especially if you live in a sunny climate like ours in Australia.
- Avoid Makeup for 24-48 Hours: I know it’s tempting to cover up that redness, but give your skin time to breathe and recover. Avoid makeup for at least 24-48 hours after dermarolling to allow the skin to heal properly.
- Don’t Pick: This one is huge—don’t pick at your skin. After dermarolling, your skin may peel slightly or feel dry. While it’s easy to want to pick off flakes, resist the urge. Picking can lead to scarring and undo all the good work you just did.
Common Mistakes To Avoid
Now that you’re armed with all the info, let’s talk about what not to do. I’ve seen a few common mistakes with dermarolling that can derail your progress if you’re not careful:
- Using the wrong needle size: I see it time and again—people trying to jump in with the biggest needle, thinking they’ll get faster results. Start small. That 0.25mm needle can do wonders if used consistently. Don’t rush it.
- Overusing the dermaroller: If you’re not giving your skin enough time to recover, you’re doing more harm than good. Stick to the recommended frequency for your needle size and don’t roll every day unless you’re using 0.25mm needles.
- Forgetting to disinfect: It may seem like a minor detail, but not properly sanitising your dermaroller can lead to infections, which is the last thing you want after all your hard work. Make disinfecting a habit.
- Too much pressure: As tempting as it might be to press down hard for “better results,” too much pressure can damage the skin, cause scarring, and lead to unnecessary irritation. A light touch is all you need.
Dermarolling Guide For Sensitive Skin, Anti-Aging, Acne Scars & Hair Growth
|
Purpose |
Recommended Needle Size |
Frequency |
Techniques & Tips |
Cautions / Notes |
|
Sensitive Skin |
0.2mm – 0.3mm |
1x per week (start) |
– Use very light pressure – Gradually increase use |
– Avoid if you have active eczema, psoriasis, or rosacea flares – Look for mild redness, not irritation |
|
Anti-Aging (Fine Lines) |
0.5mm – 1.0mm |
1–2x per week |
– Focus on forehead, around eyes, mouth – Gentle rolling in vertical, horizontal, and diagonal directions |
– Don’t use around broken skin or active acne – Apply a hydrating serum post-treatment |
|
Acne Scars |
0.5mm |
1–2x per week |
– Use crisscross motion over scars – Cleanse and sanitise both skin and roller before and after use |
– Avoid if acne is active – Can combine with hyaluronic acid or peptides for better results |
|
Hair Growth (Scalp) |
0.75mm – 1.0mm |
1x per week |
– Roll gently over thinning areas – Can pair with minoxidil or rosemary oil for added effect |
– Don’t over-roll the same spot – Disinfect the roller thoroughly before each use |
Microneedling At Home: Timeline For Visible Results
Based on my experience, the results of dermarolling aren’t immediate but show up over time. Here’s what I found:
- After 1 Session – You’ll likely see redness and mild irritation for a few hours, but there’s no immediate dramatic change. Your skin will feel more plump and hydrated.
- After 3 Sessions (1-2 weeks apart) – For me, this is when the real difference began to show. I noticed smoother skin, reduced scarring, and a healthier complexion.
- After 6 Months of Consistent Dermarolling, This is when I saw significant improvement in my skin’s texture, fine lines, and scars. My acne scars have almost disappeared, and I get compliments on my glowing skin regularly.
When To Seek Professional Microneedling Help?
If you’re starting to get serious about dermarolling and want to target deep scars or more complex issues, it might be time to consider a professional session. A professional dermaroller can penetrate deeper layers of skin and offer faster, more dramatic results than what can typically be achieved at home.
Professional microneedling can help with deeper acne scars, stretch marks, and even more advanced signs of aging. I’ve had many clients who were initially excited about DIY dermarolling, but after seeing the results from professional treatments, they opted for a more targeted, clinical approach.
Dermarolling at home is a game-changer for anyone looking to enhance their skin’s texture, reduce acne scars, or combat signs of aging. Whether you’re aiming to smooth fine lines, diminish scars, or boost hair growth, this at-home treatment provides a convenient, effective solution without the high cost of professional microneedling. By following the right techniques, using the appropriate needle sizes, and committing to a safe aftercare routine, you can achieve impressive results in the comfort of your own home. Just remember—consistency, patience, and hygiene are key to making dermarolling a success!
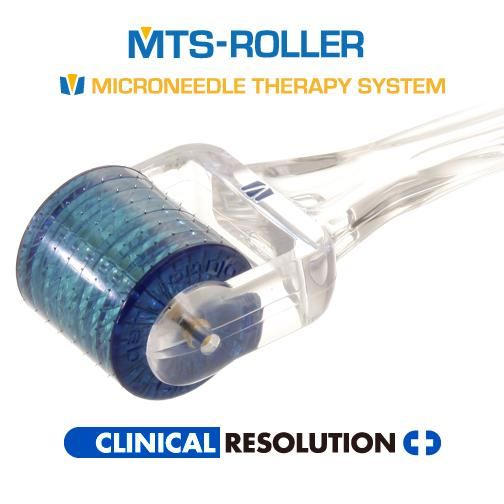
TRY:
MTS Roller ($140 at Cosmetic Injectables Victoria)